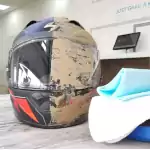
How’s it going, riders? What’s you been up to lately? Finding a way to clean your motorbike helmet? You’ve landed at the right place, so let’s get started. It doesn’t matter if you are a long-time rider or a starter; it gets dirty and smelly after a certain amount of use. Besides, there are bug guts that you’ll find covering the shell and visor.
Not only does it look gross on the outside, but it also smells horrible because of the sweat and dirt inside the helmet. These will eventually damage the helmet, and that’s what you don’t want. So, it’s important to clean this undividable partner of your motorcycle from time to time.
You’ll find many cleaning methods over the internet, some of which are really effective. However, some might damage your special helmet. So, you can be a little bit selective when it comes to choosing a cleaning technique.
How To Clean Bike Helmet At Home
The best way to clean a motorcycle helmet is to remove the interior liner and clean the inner part and outer parts separately. For the inner liner, you can dip it in a bucket and wash it with baby shampoo. And a wet towel and some q-tips will take care of the outer shell. You can also use helmet cleaners such as Motul Helmet cleaner. But make sure the cleaner doesn’t contain harsh materials such as Ammonia.
Step-By-Step Motorcycle Helmet Cleaning Guide
# Step 1: Remove the accessories from the helmet
You should remove all the electronic parts like microphones or GoPro cameras from the helmet before washing the helmet. You can also remove inner liners and padding, making the process easier. And also, remove the visor; different helmet models have other face shield removal techniques.
Then, check out the user manual and get the job done; it’s pretty simple. Finally, make sure you remove the Com unit, speakers, and mic from your Bluetooth helmet.
# Step 2: Put A Wet Towel Over The Exterior Shell Of The Helmet
Sometimes you’ll find dirt and grime caked up on the helmet’s outer surface. It’s a good idea to loosen them before you start washing. To do that, wet a microfiber cloth or towel with warm water, lay it over the helmet, and let it rest for a while. Try not to scrub it, or you’ll end up having scratches all over the surface; just let it be and let’s move on to the next step.
For the cleaning of the face shield, you can do it with warm water or a visor cleaner to clean it as well, the Muc Off Visor Cleaner is pretty good!
# Step 3: Clean The Inner Liner
In the removable inner liner, wash it gently with mild non-petroleum-based soap like baby shampoo or mild dish soap. You can go with the Johnson’s Baby Shampoo. And soak the padding with soap water and wash it with water multiple times. You can use a light laundry detergent or the soap you used to clean the inner liners earlier. Dry these in the open air, and avoid using heat like a hairdryer; it might damage the liners.
Things might get a bit confusing when it comes to non-removal inner liner helmets, but rest assured, we’ve got your back. You’ll have to use helmet interior cleaner or spray such as the Muc Off helmet cleaner kit you can find to clean the helmet. By the way, there’s a detailed post about cleaning non-removal helmet liners, be sure to check that out if you have one of them.
# Step 4: Clean The Exterior Of The Helmet
Now, it’s time for the exterior; remove the microfiber clothes you put on them earlier, and wipe them with a dry one. You can use shampoo or other non-petroleum-based soaps to clean the surface; if you find a stubborn spot, use a sponge to deal with that.
Some motorcycle helmet cleaners are also available; those will do the job just fine. And finally, wipe the helmet with a light wax, just polish it on the helmet, and you are good to go. Again, you’ll find these cleaner and wax in any motorcycle shop or online.
For the vents, use a cotton swab or Q-tips to remove the dirt from the inside. You can also use a compressor to do that, but don’t use water or alcohol material spray; it might damage the helmet.
# Step 5: Let The Helmet Dry And Put It All Together
And finally, when you are done cleaning everything, gently wipe the extra water from the helmet and let it dry for some time. Then, when all the parts are dry, put it together, and it’s ready to use, shinny, and smells fresh.
Some Additional Tips
- Wash the helmet frequently if you use it on a daily basis
- Wash the interior regularly to keep it fresh
- Change the liner if it’s worn out
- Don’t use rough cleaning materials
- Take care of your helmet to make it last longer!
Conclusion
To be honest, no one likes a smelly and dirty helmet, and its lifetime becomes short if it’s not been cleaned regularly. So, clean your helmet with a microfiber cloth every time you finish your ride and wash it at least once a month. However, you should change the helmet every five years or so.
And if your helmet is in a stable condition, you can just wash it up and make it as good as new.
Good day all!