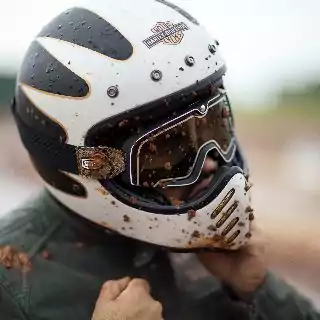
There’s no denial that helmets tend to get dirty easily, especially if it’s an adventurer helmet we are talking about. It’s super easy to get dirt, mud and scratches all over the helmet. And talk about white helmets; the scratches and dirt on a white helmet will catch your eyes more than any other color. And over time, it can get a bit yellowish or a bit dirty shade of white; you know what I mean.
And that’s why white helmets need to be cleaned frequently, no matter what type of riding style you prefer. So here I assume you have a white helmet, and it needs to be cleaned. I have some tips here, and hopefully, it’ll help you to know how to clean a white helmet.
So, let’s get started, shall we?
How To Clean White Helmet - DIY Easy Methods
To be honest, cleaning a white helmet isn’t that much different from how you clean your regular helmet. It just comes with some tweaks that might make the white helmet as it was when you bought it. Look no further if you want a detailed guideline for cleaning a motorcycle irrespective of color and gender. You can find a step-by-step guide about ‘How to Clean Bike Helmet?’
Step-1: Check the User Manual first!
One thing you should definitely do before messing with your helmet is to check the user manual of the helmet. Because most of the helmet manufacturer shows how you should clean the helmet and what are the things you shouldn’t do. So, check that out, and the last thing you want is to void the helmet warranty.
Step-2: Remove the Inner and Outer Parts
While cleaning a helmet, the first thing you should do is to separate all the helmet parts. It’ll help the cleaning process and also will boost the speed of cleaning. After dividing, we most likely have three parts to wash, the visor, the interior, and the shell itself. Don’t forget to remove speakers and communicator from your bluetooth helmet.
Now, soak a microfiber towel with water and let it sit on the helmet and visor for a few minutes. It will get the dirt and bug guts to soften and make the process smooth and without any further damage. If you rub the outer surface of the visor and shell without letting it soften, the hard dust particle will most likely damage the surface. And you don’t want that on your helmet.
Bonus Tip: Cleaning Products you Should Use and Avoid
And the materials you’ll need are microfiber cloths, baby shampoo, and some warm water. You can use some mild cleaning products, but they shouldn’t contain any ammonia or any rough ingredients. The Motul Helmet Cleaner is pretty popular, and it works great. However, be careful about the visor, it tends to get damaged pretty easily, and good-quality shields aren’t that cheap.
Step-3: Take Care of the Shell
For the outer shell of the helmet, which is the white helmet of yours, you covered it with a wet microfiber towel, right? That’ll soften the hard dirt particles as we did with the visor. Now wipe the helmet with a dry towel, same as the visor; most of the dirt will be clean if you do so. And for some of the dirt or scratches left after the wiping, don’t overdo it.
In order to remove those, you can softly rub those spots with your finger or the wet microfiber you got. If the scratches or scuffs are still there, you can use some suitable cleaning products for the shell. You can use the Motul Helmet Cleaner as mentioned before or any aerosol sprays Like Honda Spray Cleaner.
Don’t use any strong cleaners that might damage the shell material on the first try. Always keep in mind that the mild cleaners and baby shampoos are enough to make the exterior clean.
And for the small and tricks parts such as vents, you can use a toothbrush to clean those; it doesn’t have to be a brand new one, though.
Step-4: Let's Clean the Visor
So, you left a wet towel on the visor, right? Let it sit for a few minutes; remove the wet towel and wash the visor with water. Remember to remove any anti-for inserts before washing or putting the wet towel on the visor. The anti-fog coating might get dissolved into the water otherwise. And God bless you if you have an iridium visor, it’s super easy to get them scratched.
After washing the visor, wipe it with a dry microfiber towel, and the work with the visor is most likely done. You can also use some visor cleaning products; however, they shouldn’t contain ammonia or alcohol. Try the Muc Off Visor Cleaner, that’s a good one.
Step-5: Also, Clean the Guts
Now let’s move on to the interior cleaning process of the helmet. First, you should detach the helmet’s interior in most cases, as almost all helmets nowadays come with a removable and washable interior. So, pull out the inner materials, and you have to wash them with baby shampoo. A Johnson’s Baby Shampoo will get the job done.
We are using shampoo because it removes oil and dirt from the inner paddings as it does with our hair. So, wash the inner materials real good and let them dry; that’ll do here. If your helmet has a non-removal inner liner, check out our ‘How to Clean Non-removable Helmet Liner‘ post.
Conclusion
So, that should take care of cleaning your white helmet, and remember to check out the user manual first. You shouldn’t use any stuff that might eventually void the warranty. Remember, do not use strong cleaners on your motorcycle helmet, and simple tricks are good enough.
Good day, guys!